Guides
How To Create & Manage Liquidity
How to use the Ramses DEX to add your Token Assets to a liquidity position and start earning Fees & Emissions
Breaking Down The Liquidity Page
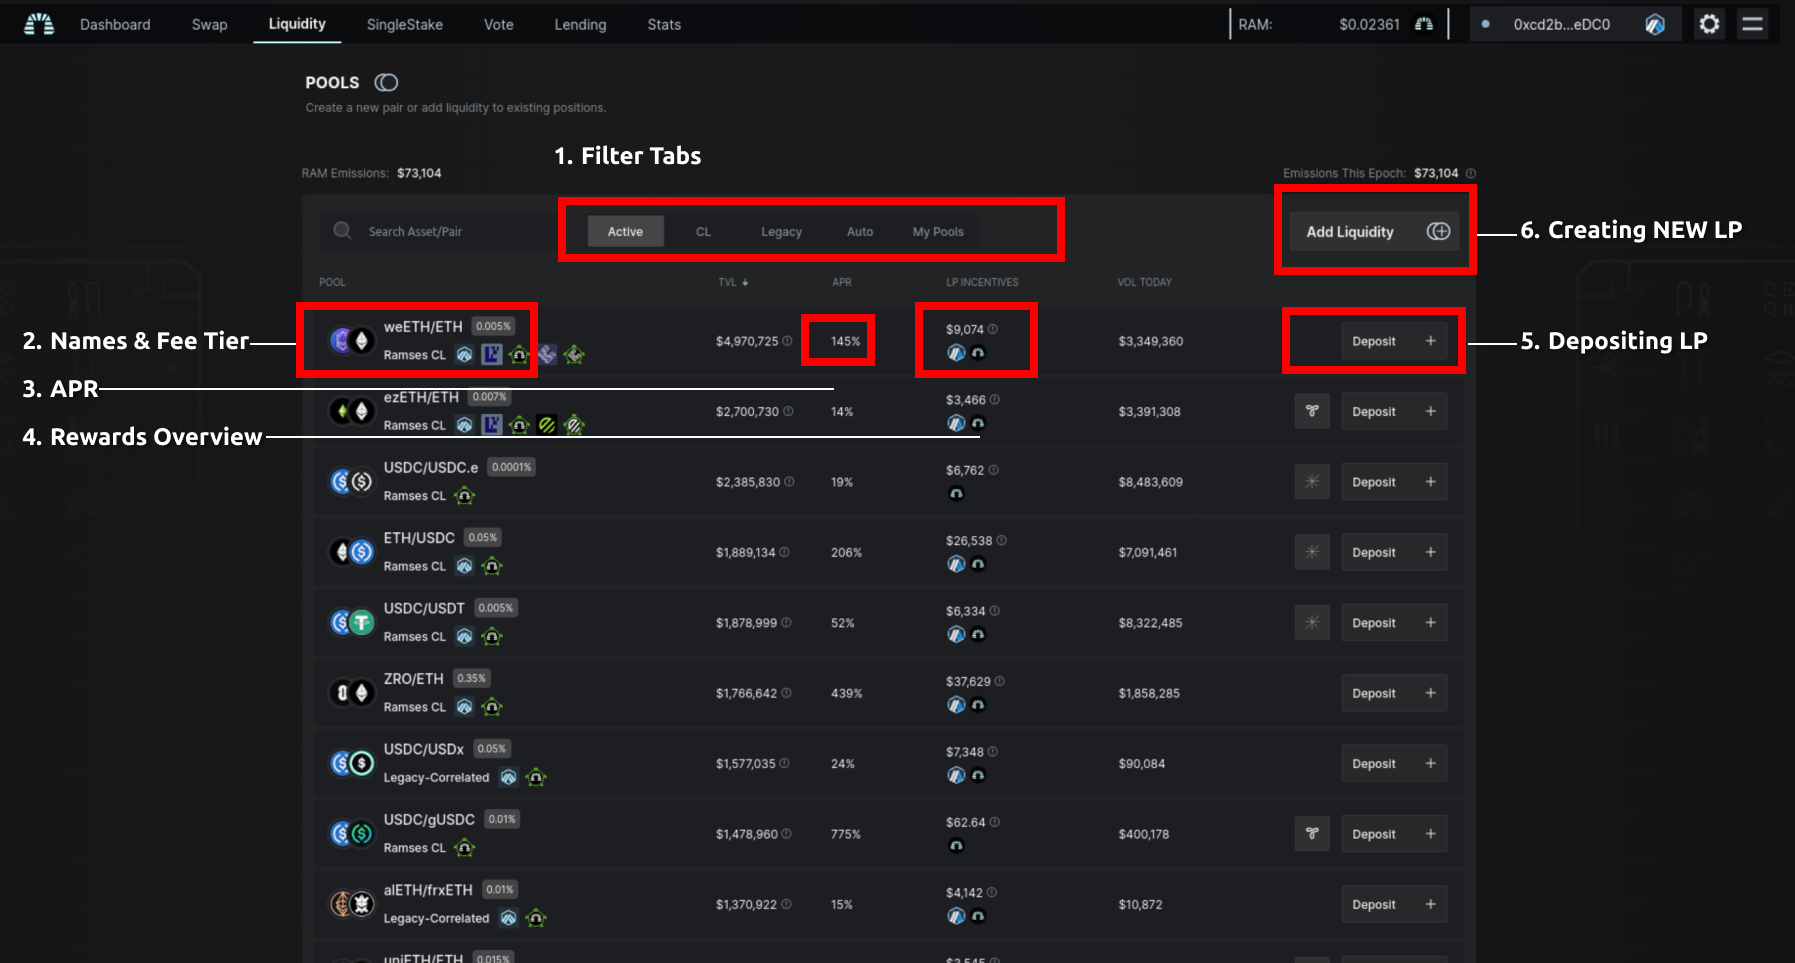
- Filter Tabs allow you to drill down on assets and liquidity types that interest you for faster sorting.
- Name & Fee Tier show you the pairing and fees set for that pair. Below each pair you can find a set of badges that indicate important programs, incentives, or even DEX performance.
- APR is a average earning rate based on: emissions to the pool & fee performance over time on average. It is important to note that APR on the Liquidity Page is based on the most COMMON liquidity depth of that pool. It does not represent individual performance.
- Rewards overview shows Emissions being earned in this pool as well as token logos for the tokens being earned. If extra LP Incentives outside protocol emissions have been added they are lumped together here and broken down when hovered.
- When selecting the deposit button, users are directed to the Manage Liquidity page for that individual pair.
- Since the DEX is permissionless if a pool is not shown on the list a user may create a custom pair and fee tier for their token via the Add Liquidity button.
Important
A pair must be WHITELISTED to begin earning EMISSIONS. If not whitelisted, the pair will earn swap Fees ONLY.
Depositing Liquidity
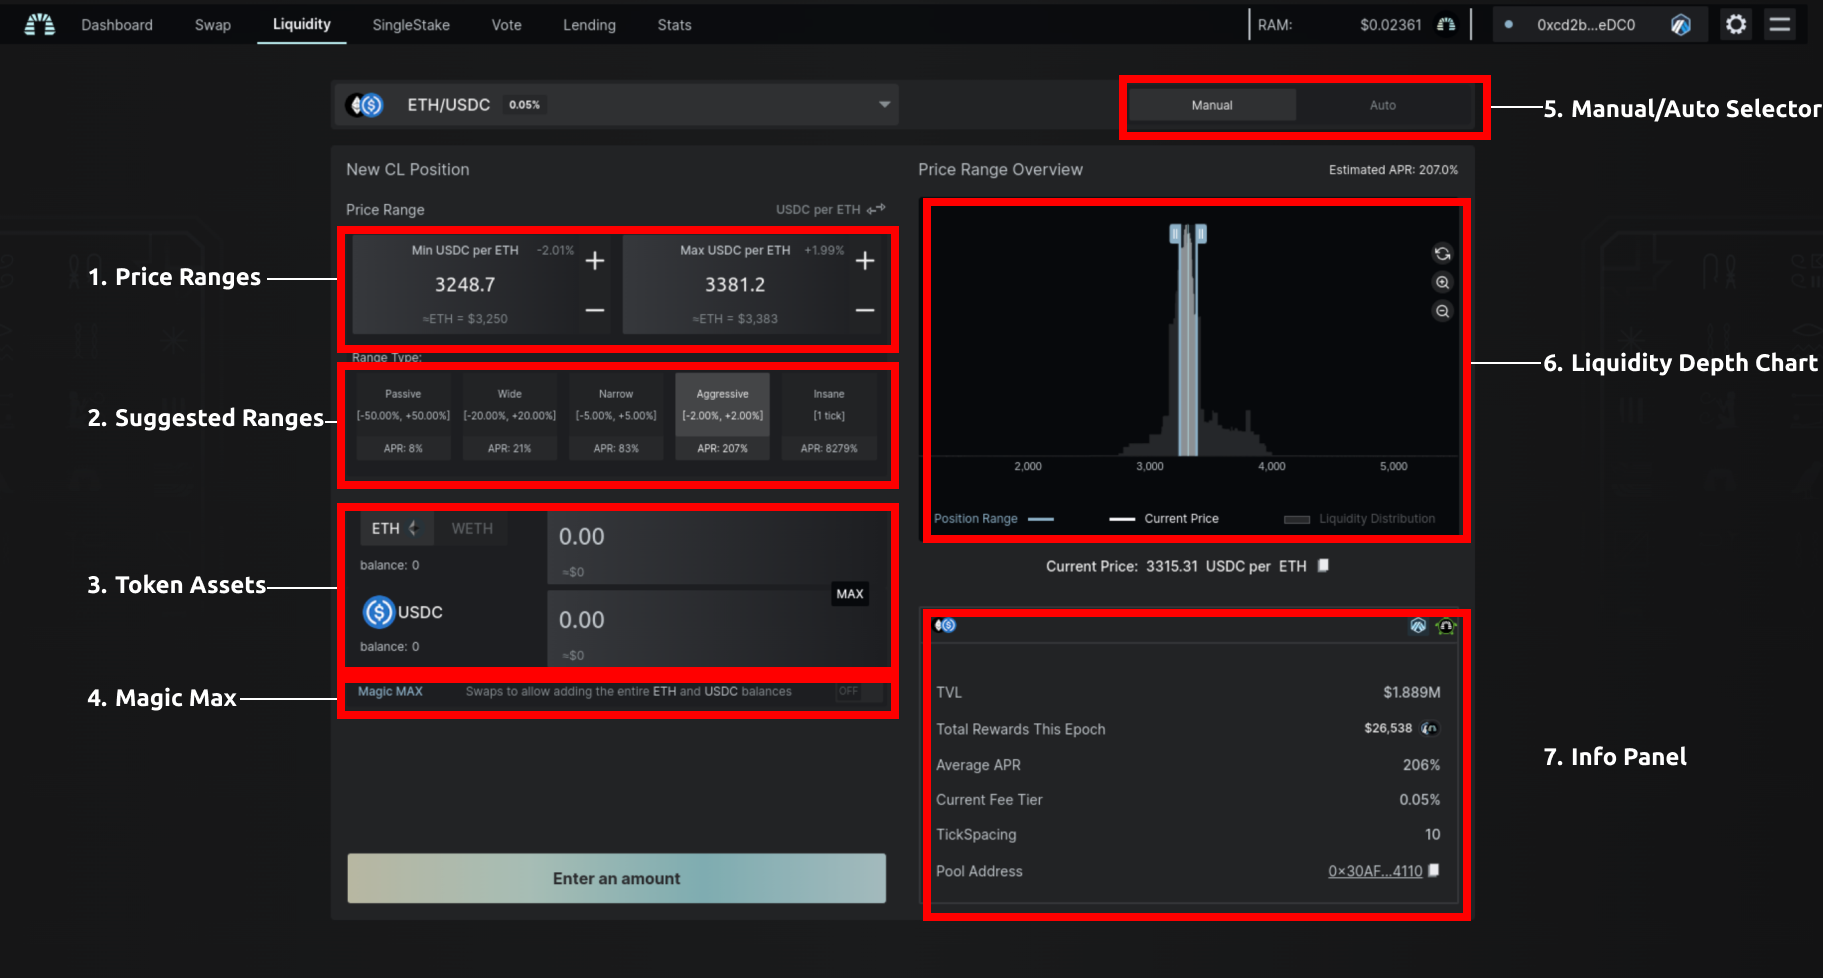
Let's breakdown exactly how to add your first liquidity and what each setting does to give you the best results.
1. Price Ranges
Price Ranges allow a completely custom range selected by the user. The first is the LOWER price range you agree too, the right box sets the UPPER price range you agree too.
In this example we ONLY agree to provide liquidity for ETH/USDC between the price of $24.75 & $25.79. This is important since users ONLY earn when the current price is between these two ranges.
Check out this GIF that shows how moving the ranges around can result in different ESTIMATED APR (top right): 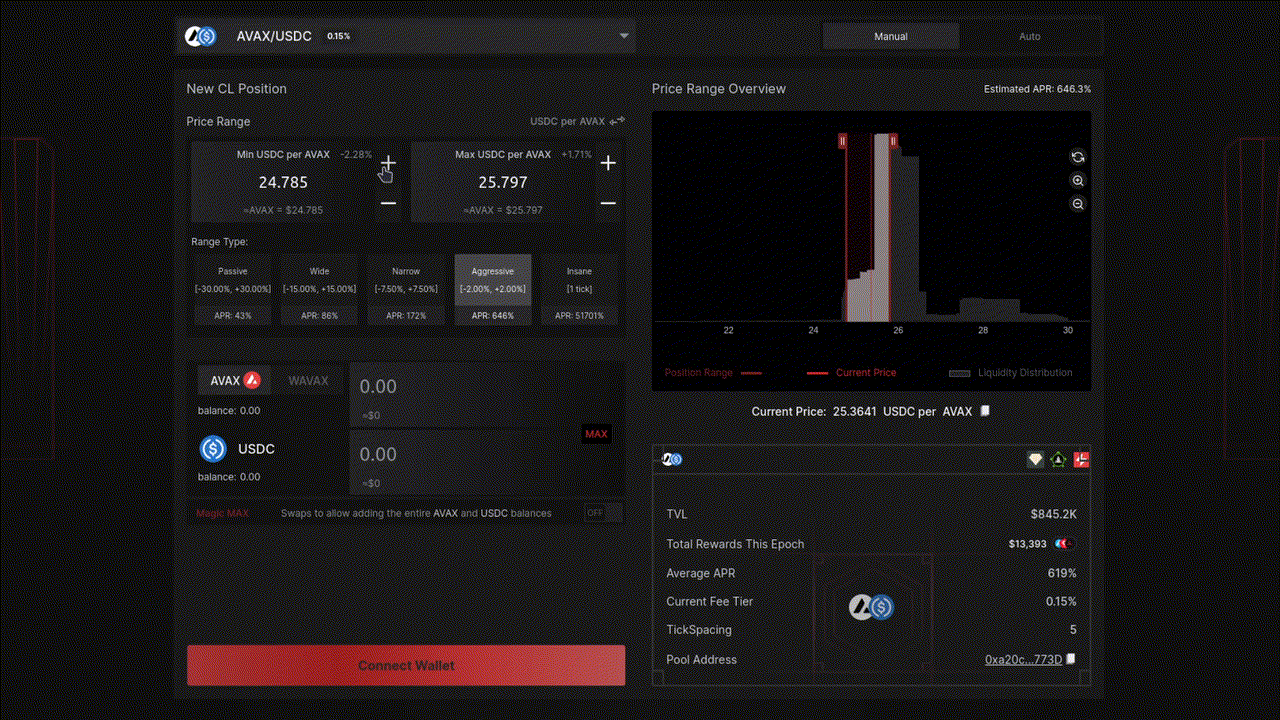
This is due to our novel Competitive Farming where the most efficient liquidity results in higher earnings for the user!
2. Suggested Ranges
Suggested Ranges is default ranges (in percents) that give the user quick & easy options to providing liquidity without having to focus on custom price ranges.
3. Token Assets
This allows you to see the current assets in the Connected Wallet that apply to the current Token Pair selected.
4. Magic Max
When providing Concentrated Liquidity, it can be common that the 2 assets being added are not always 1:1 in ratio resulting in complicated mathing by the user. We created Magic Max to help users quickly swap the perfect ratio of assets to apply based on the price ranges selected.
5. Manual / Auto selector
A manual position is any LP a user manages and creates themselves. When selecting AUTO you are now given the option to deposit into on of our participating partner Auto Liquidity Managers. In this case it's GAMMA.
In short ALM's can be a great option for users wanting to utilize the efficient Concentrated Liquidity model but cannot be super active in the management of it.
6. Liquidity Chart
This chart shows your currently selected ranges (left and right red handles) while also giving you an overview of the ranges of other liquidity added on any specific pairing.
This can help you gauge if your price range may be unrealistic, or in tune with other liquidity. Remember:The higher the peaks on the chart equates to deeper liquidity at that price range.
7. Info Panel
The Info Panel gives and overview of the position including the total TVL, fee tier, average apr, tick spacing, and pool address.
Important
Please remember the risk of Impremanent Loss when providing Concentrated Liquidity and understand this is a simple guide and not in-depth which may take more advanced research!
Dashboard
After creating a new position, users can view positions anytime by going to the Dashboard.

As you can see from above, you can now track your true APR, as well as the value of your position. Rewards can be claimed anytime and are updated in real time. At the far right side you can see at-a-glance where the current price is compared to the ranges you've set.
You can manage the position anytime and remove/add assets.
The Risks
Providing Concentrated Liquidity proves to be the most efficient liquidity in the entire DeFi ecosystem, but by tightening your ranges you are setting yourself up for potential Impermanent Loss!
For instance, in the example above let's assume the price of ETH has fallen below our lower range of $24.78. This would result in your position no longer earning any emissions or fees as well as it all being represented in ETH. Meaning if ETH were to continue falling in price you now have a bigger loss than if you were only holding USDC.
Inversely let's say it appreciated in price, this would result in your position being represented in all USDC and being exposed to no ETH. This would limit you to the upside of token price appreciation.
This is why it is very important to understand the price ranges you set, and be able to check positions often ESPECIALLY when providing "tighter ranges".